Installing Packages
Written by Steve Repasky
Safety is important and even though bees can be gently, when installing a package of
bees, you should wear a veil and take appropriate precautions to prevent bees from
crawling up you pant legs. You also will need a hive tool, a small nail, a couple of large
rubber bands, a spray bottle filled with sugar syrup (1:1), and one or more gallons of 1:1
sugar syrup to feed the new colony. Your equipment should already be set up days in
advance of your bees arriving.
1. Carefully inspect the bees to make sure they are alive and in good health (it is normal
to have up to about one inch of dead bees in the bottom of the box). Spray the bees
with sugar syrup- a light spray will do – no need to make them wet.
2. Make sure the bees are not exposed to excessive heat or cold. Periodically, if not
installing immediately, 3-4 times a day spray the bees with 1:1 sugar syrup until you are
ready to install the bees into a hive.
3. Be sure to keep your hands away from the screened sides of the package to avoid
getting stung through the screen. Place the package on the ground in a shaded area or
inside if temperatures are below 50.
4. Remove three or four frames from the center of the brood chamber to create a space
in the hive for the bees.
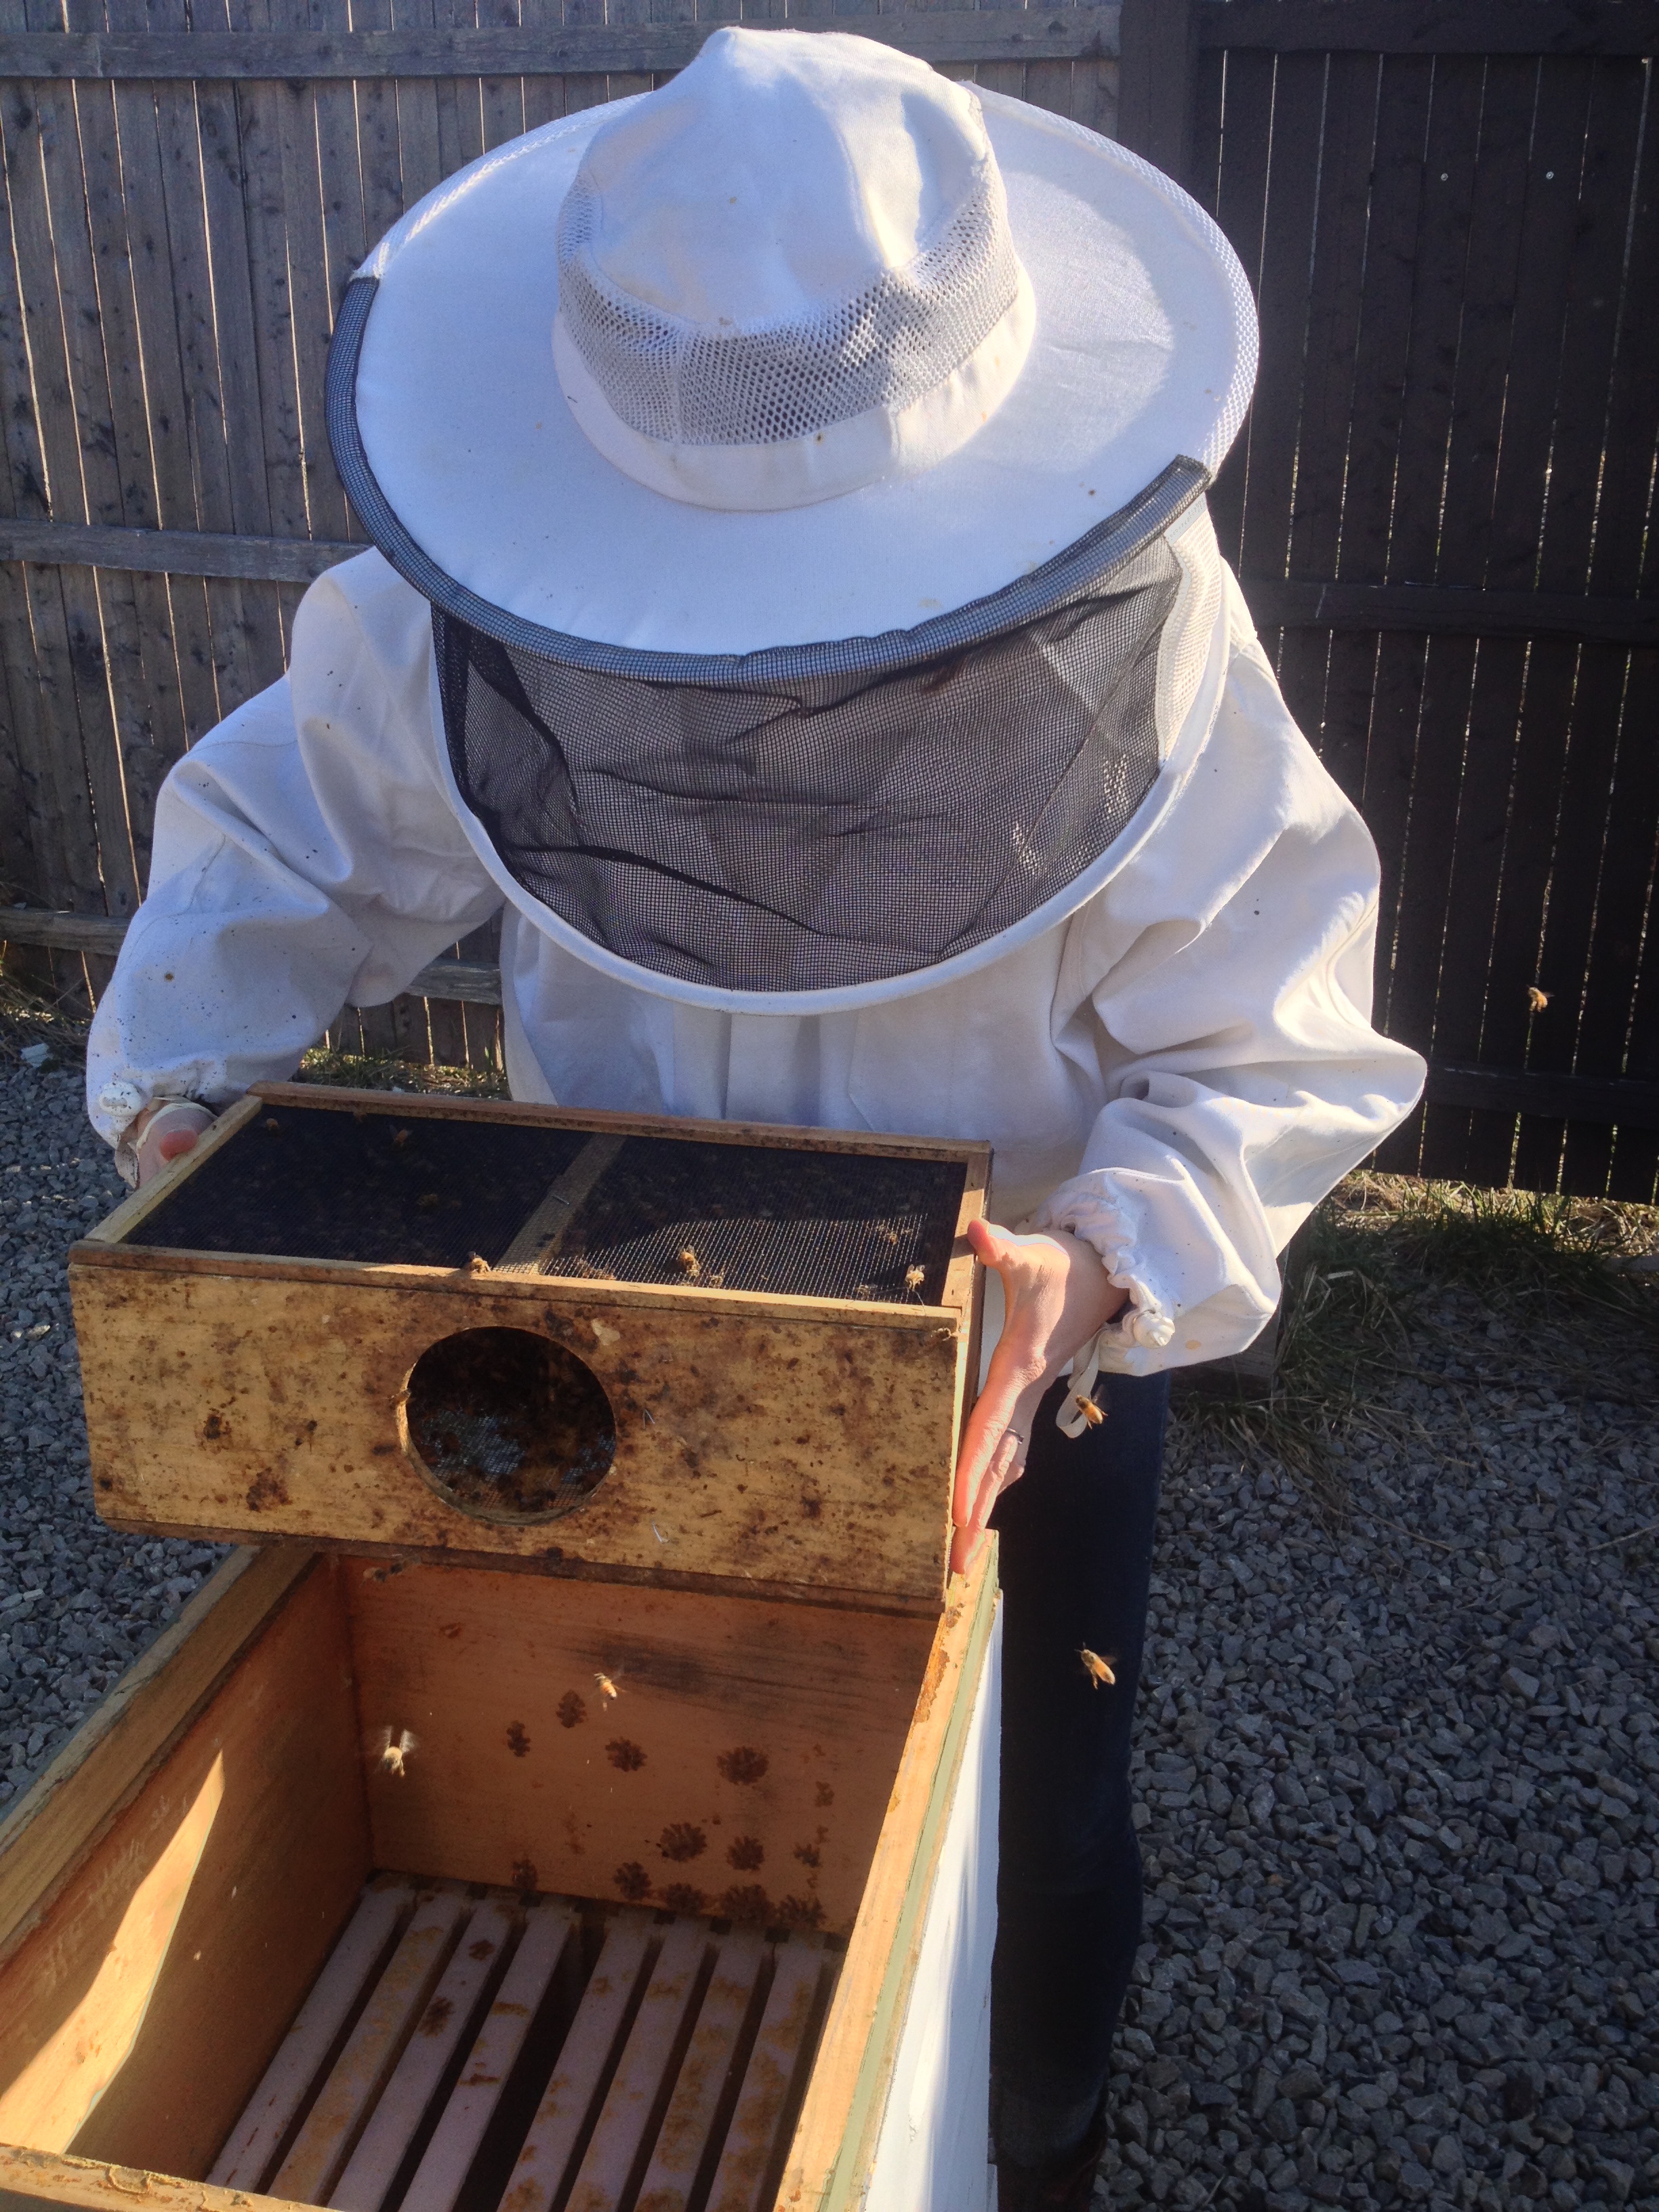
5. Give the package a good knock on the hive or the ground to knock the bees into the
bottom of the cage. With the hive tool, remove the wooden panel from the package of
bees. Gently remove the feeder can and queen cage from the hole in the top of the
box. Place the wooden panel back over the hole to prevent bees from escaping. Shake
bees from the outside of the queen cage and inspect the queen to ensure that she is still
alive and healthy. Place the queen cage in a protected area.
6. Immediately before installing the bees into the hive, firmly knock the package on the
ground once to make the bees drop to the bottom of the box. Be sure to hold the
wooden lid in place while doing this.
7. Next, remove the wood panel and quickly invert the package over the hive body.
Firmly but vigorously shake the bees into the space in the hive. It might be necessary to
shake the package several times. Don’t worry if there are a large number of bees flying
around; they are largely “confused” and therefore not defensive, and they will
eventually settle down and enter the hive. www.burghbees.com
8. Prop the package near front of the entrance of the hive so that any remaining bees in
the package can crawl into the hive.
9. Gently return the frames to the hive after the workers have dispersed being sure not
to crush any bees.
Installing the queen
1. Remove the cork from the side of the queen cage with the white sugar candy. The
bees will eat the candy and eventually release the queen within one or two days. This
time-release method allows the bees to become accustomed to the queen, minimizing
the chance that the bees will reject the queen. Do not remove the cork on the end
without the candy!
2. Place the queen cage candy side up between two center frames of the hive. Use a
rubber band to secure between the frames so that it does not fall to the bottom of the
hive. Make sure that the screen side is accessible by the other bees.
3. Feed the new colony with sugar syrup. It is critical that the bees have an ample supply
of food at all times, particularly before there is a sufficient supply of honey stored in the
colony. Replace the inner cover and lid.
4. Inspect the colony 5 days after installing the package to ensure that the queen is alive
and has been released. Inspect the colony again after another 5 days to verify that the
queen has begun laying eggs. Eggs appear as small grains of rice standing up in the
center of cells. If necessary, add sugar syrup again at this time.
Helpful video:
“Installing a Package” by Brushy Mountain Bee Farm
http://youtu.be/_31TcM7J-SU
Register your hive with your state (link to PA here)-
http://www.pastatebeekeepers.org/pdf/registration.pdf


